At a Glance
This Term Start Checklist is a road map for teaching teams. It outlines key steps to prepare your course technology so you’re ready to teach on Day 1.
Part 1: Find Your Course(s) in Canvas
Canvas courses are created before the term starts so that you have time to prepare them. Refer to our calendar for this year’s Canvas course release dates. Once Canvas courses are available, confirm the following:
Do you see the courses you expected for the current/upcoming term on your Canvas Dashboard? Note: See How to Access Past Courses in Canvas to learn how to find courses from past terms.
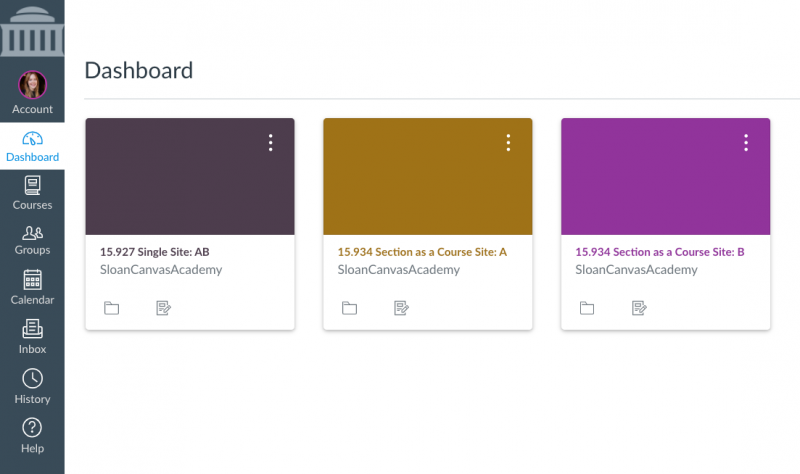
- If you’re teaching a Sloan course that you do not see on your Canvas Dashboard:
- If you see a Sloan course on your Canvas Dashboard that you are not teaching:
- If you want your Canvas courses configured differently, contact us.
Tip: By default, courses get the same Canvas site configuration from term-to-term unless you request a change. For example, if your two-section course shared a single Canvas site last term, we will give you a single site again this term. However, if you want each section to have its own Canvas site this term, that’s no problem. Contact us to request this change.
Part 2: Make a Plan With Your Teaching Team
The best teaching teams have a plan to divide and conquer. From hiring your TAs correctly to making sure everybody attends training, pre-term preparation makes for a successful course launch. Make sure to do the following:
- Instruct your TAs to set up their appointment:
- Follow the school’s TA workflow via the TA Hub so they are added to your Canvas course.
- Come to training:
- upcoming trainings and register for sessions that meet your needs.
- Require TAs to attend all Essential Trainings.
- Canvas Essentials is required for first-time TAs but open to all. It covers how to support faculty and students on Canvas confidently, manage your course roster, grade efficiently and equitably, avoid common pitfalls, and contact support. An hour now will save you time and increase your capability to help your class succeed this term.
- Attend any practice sessions your teaching team needs.
- Meet as a teaching team (faculty, primary course admin, and TA) to make a course management plan. Consider the following:
- Who will submit the course copy request?
- Who will submit the Study.Net course pack request?
- Who will build the Canvas course (e.g., update Study.Net and Harvard Business Publishing (HBP) links in assignments and/or modules, adjust due dates, update any dates included in the Module names)?
- Who will schedule Canvas calendar events (e.g., course meet times, recitation sessions, office hours)?
- Who will manage the Canvas course (e.g., post announcements, manage waitlist students using the Membership Tool, grade assignments)?
- Who will coordinate your classroom technology needs (e.g., submit an AV Support Request for a remote guest speaker)?
- How will attendance be tracked (e.g., aPlus+ Attendance, spreadsheet, printed sign-in sheet)?
Tip: Skip the manual work—our team will copy your course for you, bringing over only the content you need and leaving out old announcements, discussions, and calendar events.
Part 3: Build Your Canvas Site
The next step is to build your Canvas course according to MIT Sloan’s Gold Standards. These are student- and research-driven best practices developed in a school-wide effort to build consistent and effective Canvas sites that allow students across Sloan to quickly and easily find what they need in all their courses.
Technical Checklist
Complete this checklist to make sure the technical details on your course site are ready for launch.
- Check the files, assignments, and modules for accuracy (due dates, content, etc.).
- Confirm that students can view/download items in Canvas.
- Quickly check your entire course site for broken external links with the Link Validator tool.
- Verify that your Study.Net Course Pack loads properly (if applicable).
- If the course pack loads and you see the readings → you’re all set.
- If the page is blank → contact your teaching team to confirm that the request has been submitted and published.
- Students cannot access readings until the course pack is published in Study.Net.
- If you have any questions about your Study.Net Course Pack or if it is NOT loading in your Canvas course, contact Study.Net’s Customer Service team directly.
- Relink your Harvard Business Publishing (HBP) content (if applicable).
- Ensure your Canvas calendar events are correct.
- Select your grade posting policy in the Gradebook:
- Automatically Post Grades: Grades are visible to students as soon as they are entered in the Gradebook. This option is selected by default in all Canvas courses.
- Manually Post Grades: Grades are hidden from students until you manually post the grades for each assignment. Selecting this option at the start of the term is strongly recommended.
- Adjust the end date of your course, if needed; otherwise, the course becomes “Read Only” when the term ends.
- Use Student View to review your Canvas site before publishing and ensure everything appears as expected from the student perspective.
- Student View works well with Canvas-native tools (Assignments, Modules, Pages, Quizzes, Grades). It does NOT work with A+ Attendance, Course Overview, Harvard Business Publishing (HBP), Photobook, or Study.Net Materials.
- Publish your course in Canvas when you’re ready for enrolled students to see it.
Gold Standards Checklist
Complete this checklist to ensure a quality student experience in accordance with MIT Sloan’s Gold Standards for building effective Canvas courses.
- Modules are labeled with the class date and topic.
- All assignments and deliverables (graded or not graded) are created as assignments with a due date.
- Course content, instructions, links, etc. are added to modules as items.
- All files are labeled with the class date and subject.
- The Course Navigation Menu is customized to show only necessary items.
- You have structures in place to solicit informal feedback from students about your Canvas course, such as announcements linked to informal surveys.
Tip: We recommend bookmarking our Quick Start Guides for Course Admins and TAs. These guides link to step-by-step instructions for common tasks teaching teams handle throughout the term—from setting up your Canvas site to managing the course roster, assignments, and grading.
They’re designed so you don’t have to dig for answers—everything is in one place when questions come up.
Looking ahead to the end of the term? Review the End-of-Term Canvas Checklist. It highlights the key steps teaching teams often handle—from deciding what students can access after the term ends to exporting final grades for the Registrar.
Part 4: Prepare Your Classroom Technology
Special AV Requests
Some classroom technology needs require advance planning. Contact our team early for:
- Remote Guest Speakers:
- In-Class or Online Simulations:
- Request Simulation support at least 2-4 weeks in advance. Simulation setup can be complex and requires ample lead time. For example, your software licenses need to be current and the simulation software must be on the latest version. We also prepare Virtual Machines (VMs) when applicable and schedule a technician to support your in-person event.
- Other Special AV Needs:
- If you’re planning an in-class activity that will have unique AV needs (e.g., a panel of speakers, multiple microphones, etc.), submit an AV Event Request or request an AV Consultation for help conceptualizing and planning.
Classroom Recordings
The process varies by term, so here’s a quick overview of what to expect for livestreaming and classroom recordings for in-person courses in MIT Sloan classrooms (E62, E52, and E51):
- Spring and Fall:
- IAP and Summer:


