At a Glance
Poll Everywhere is a web and SMS text-messaging student response system. Use Poll Everywhere to create polls ahead of time and launch in your web browser during class to collect and display real-time responses that students provide with a laptop or mobile device.
In this guide for faculty and teaching teams, you’ll learn how to create a Poll Everywhere poll and deliver it during a class session.
How to Get Support
Poll Everywhere
Poll Everywhere provides end-user support as part of MIT’s Enterprise license. If you have questions about using Poll Everywhere and its features, you can contact them directly by:
Information Systems and Technology (IS&T)
Email polleverywhere@mit.edu for any questions related to Poll Everywhere, including:
- Presenter licenses
- Accounts
- Teams
How to Request a Presenter License
A Presenter license is required to use this tool.
Prepare Your Polling Activities
Create a Poll
Poll Everywhere offers several types of activities you can use to interact with your students, including:
- Multiple-choice polls
- Word cloud
- Clickable images
- Select on map
- Open-ended questions
- Q&A
- Brainstorm
- Rank order
- Survey
- Donut chart
- 2×2 matrix
- Upvote
For step-by-step instructions on creating an activity in Poll Everywhere, refer to Create an Activity.
Choose How Students Can Respond to a Poll
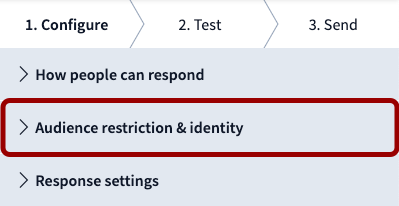
You can control how students respond to your poll. Set a response method by doing the following:
- In a polling activity, click on the Configure tab in the menu on the right-hand side of the screen.
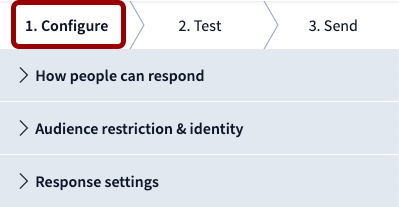
- Under the How people can respond tab [1], check one or both of the following options [2] for how you would like your students to be able to respond:
- Website
- SMS text messaging
- Note: Depending on the activity you have selected, the Text Messaging option may not be available.
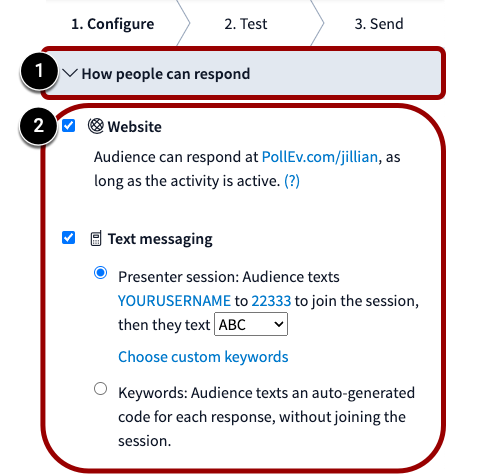
Tip: All activity types can receive responses via the web, but only open-ended and multiple-choice questions can accept text message responses.
Optional – Set a Timer
You can set a timer on an activity to limit the time participants have to respond:
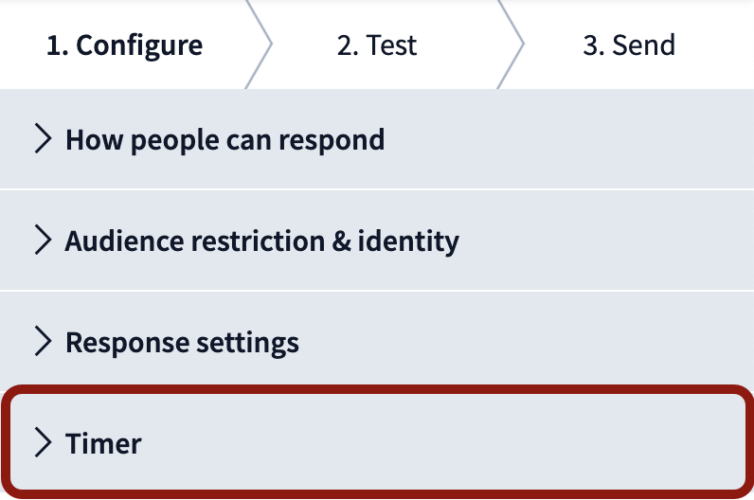
- In a polling activity, click on the Configure tab in the menu on the right of the screen.
- Click on Timer tab.
- Toggle the timer on [1], and enter how long you’d like your poll to remain open in minutes and seconds [2].
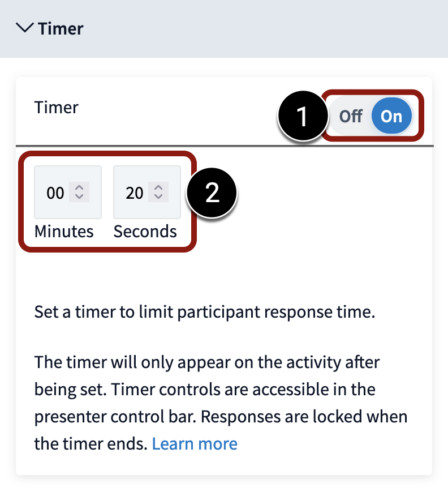
- Once the timer is set, the countdown timer will be displayed in the activity title.
- The timer will begin to count down when you activate the activity.
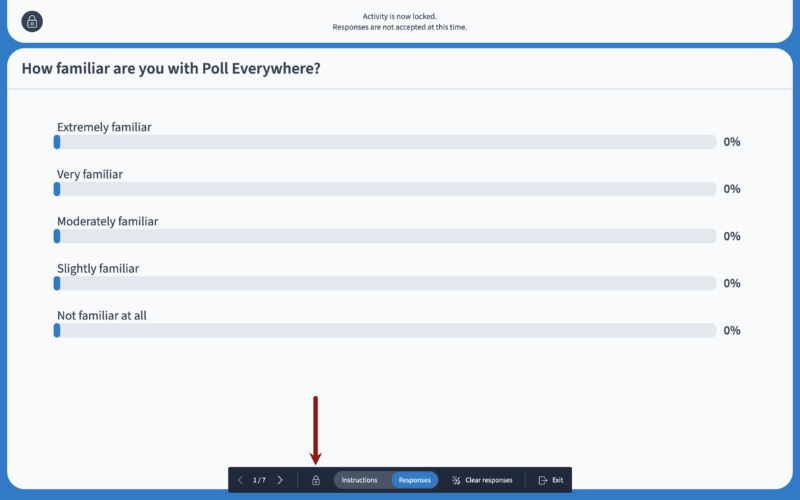
- When the timer hits zero, the polling activity will automatically lock. When the activity locks, the audience can still see the activity on your PollEv.com presenter page, but no more responses will be accepted for that activity.
To learn more about using a countdown timer, refer to the Countdown Timer guide.
Tip: MIT’s Enterprise license for Poll Everywhere allows up to 1000 responses per poll.
Wrap Up Your Polling Activities
Deactivate a Poll
To stop students from seeing your poll on your Poll Everywhere response page, click the Deactivate button to deactivate the poll.

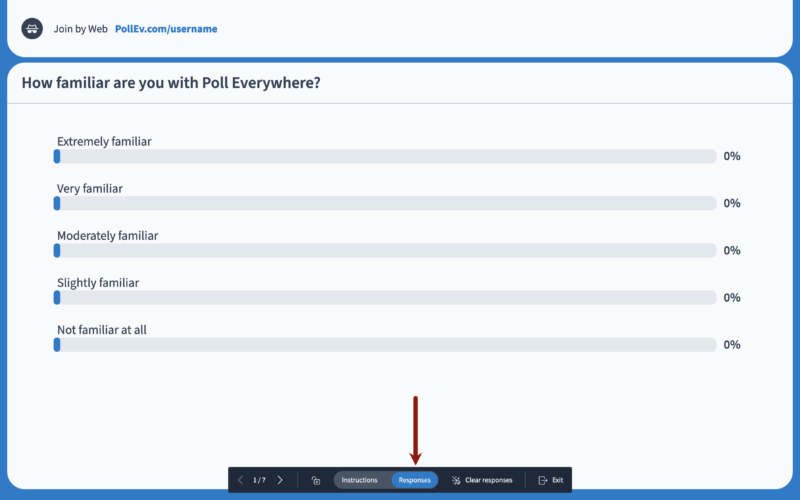
View Responses for a Poll
Poll Everywhere stores your responses for later review. You can review your responses by doing the following:
- From a polling activity, click on the Response History button in the bottom-right corner.
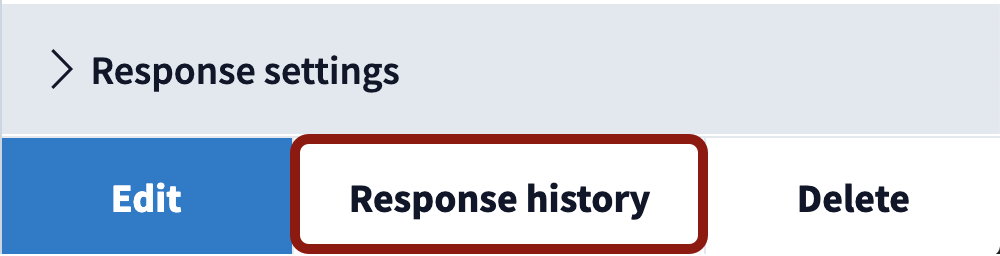
- On this page, you will find:
- A summary
- List of individual responses
- Link to download a spreadsheet (.csv) of the results
- Link to download a screenshot
- Show full report
Create a Report of Responses
There are several different report types that can be created, saved in your Poll Everywhere account, or downloaded to your computer.
For an overview of the different report types, refer to the Introduction to Reporting guide.
For step-by-step instructions on creating a report in Poll Everywhere, refer to the Creating a Report guide.