At a Glance

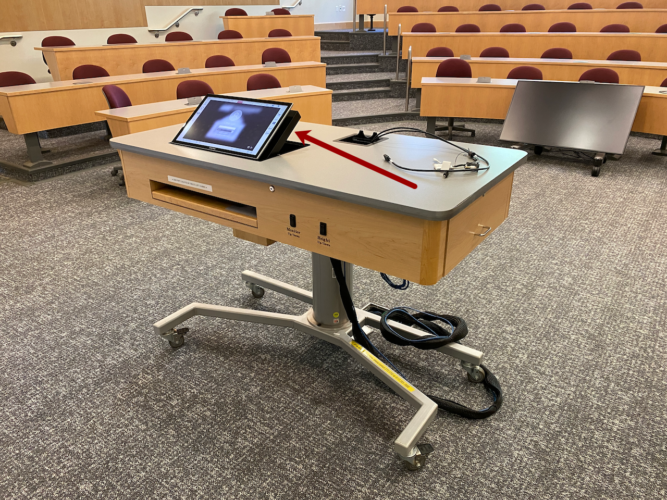
MIT Sloan classrooms with a Teaching Table include a built-in document camera that lets you display physical materials—such as printed documents or handwritten notes—directly on the projector screen.

You can use the document camera to:

  • Point to and highlight specific details on physical materials
  • Write or draw annotations in real time
  • Share close-up views of objects with the class

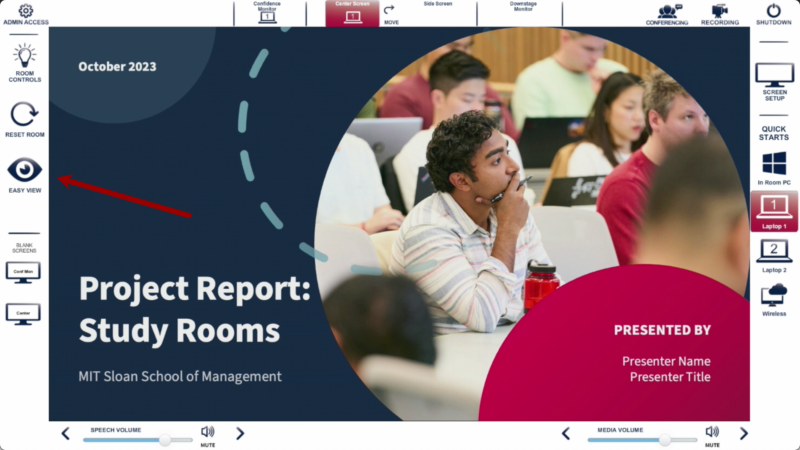
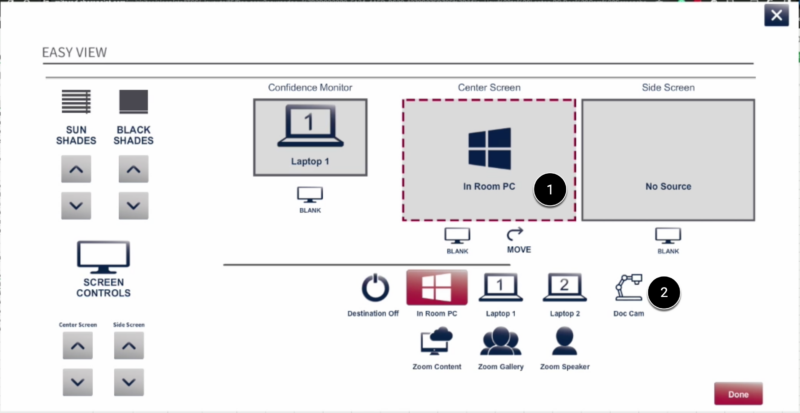
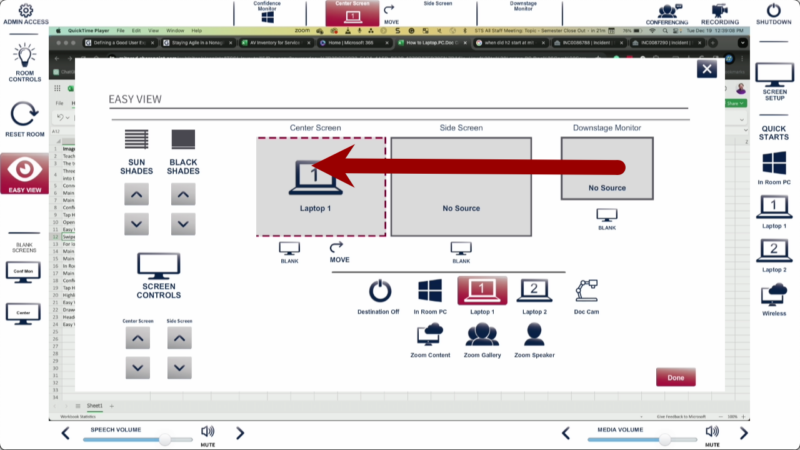
This guide explains how to turn on the document camera and control where it appears using the Touch Panel.

Activate the Document Camera

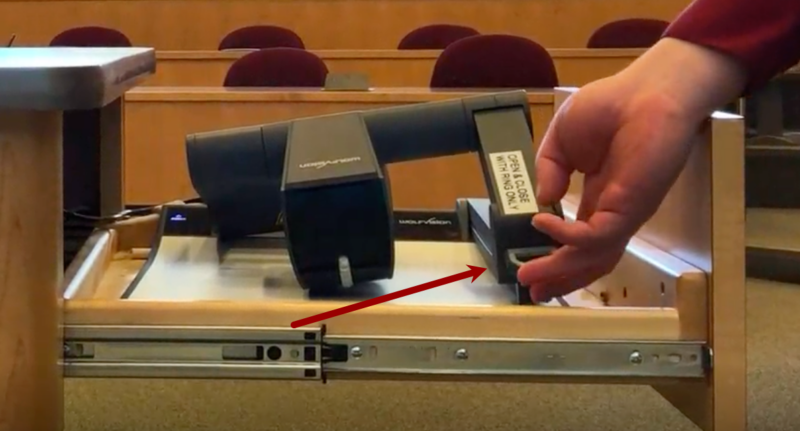
  1. Locate the Teaching Table and Touch Panel in the front of the room.
    Picture of an arrow pointing to the teaching table
  2. Open the drawer on the right side of the table.
    Picture of an arrow pointing to the document camera drawer
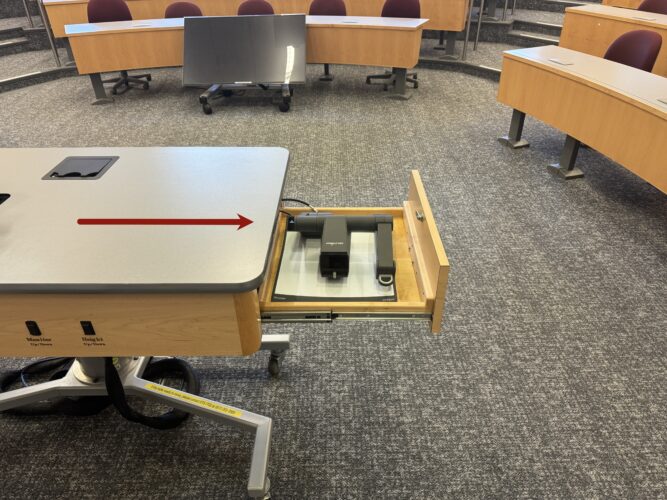
  3. Lift the document camera using the ring labeled “Pull” on its arm. It will power on automatically.
    Photo of someone properly lifting the document camera up by the ring

IMPORTANT: Only use the “Pull” ring to raise or lower the camera. Do not lift it by the arm, camera head, or light, as this can damage the equipment.

Choose Where the Document Camera Shows in the Room

We refer to devices like the document camera as Sources or Inputs, and all projectors, displays, and screens as Destinations. Changing what appears on these displays is called Video Routing. Use the Touch Panel on the Teaching Table to adjust video routing through one of three options: Quick Starts, the Menu Bar, or Easy View.
Photo of Teaching Table in Classroom

Routing Option 1 – Menu Bar

  1. On the top, you will see the available destinations for the Document Camera.
    Screenshot of the top of the teaching table interface in classrooms with an arrow pointing to the header where you can change inputs
  2. Tap on the screen or monitor you want to see the Document Camera on [1]. Select Doc Cam [2].
    Screenshot of the classroom UI with the document camera sected on the center screen
  3. Repeat Steps 1-2 until the document camera appears on all desired classroom projectors and monitors.
  4. Optional: If you want to use the chalkboard and only one screen is active, tap the Swap button at the top center of the Touch Panel. This turns off the Center Screen and displays your laptop screen on the Side Screen.
    • Tap Swap again to return your content to the Center Screen.
    • If two screens are active, the Swap button exchanges the content between them.
      Screenshot of the classroom interface with an arrow pointing to the move button

Tip: If you want to use the chalkboard in the classroom, tap the Move button in the top center. This will turn the Center Screen off and put the Document Camera on the Side Screen. Simply tap it again to bring your content back to the main screen. If you have two screens active, it changes to a Swap button to exchange what is on the screens.

Screenshot of the classroom interface with an arrow pointing to the move button with the doc cam up

Routing Option 2 – Easy View

This is one panel that contains screen routing and some room controls. It is meant to put things in one place.

  1. On the left side of the touch panel, you will see a button for Easy View.
    Screenshot of the teaching table UI pointing to Easy view
  2. Tap on the screen or monitor you want to see the Document Camera on [1] and select Doc Cam [2].
    Screenshot of easy view with the center screen highlighted and the doc cam pointed to
  3. Repeat Steps 1-2 until the Document Camera appears on all desired classroom projectors and monitors.
  4. To choose the Downstage Monitor (the display on the ground), swipe left on the Destinations and repeat the above steps.
    Screenshot of the easy view panel indicating one needs to swipe left to get to the downstage monitor.